my DIY high
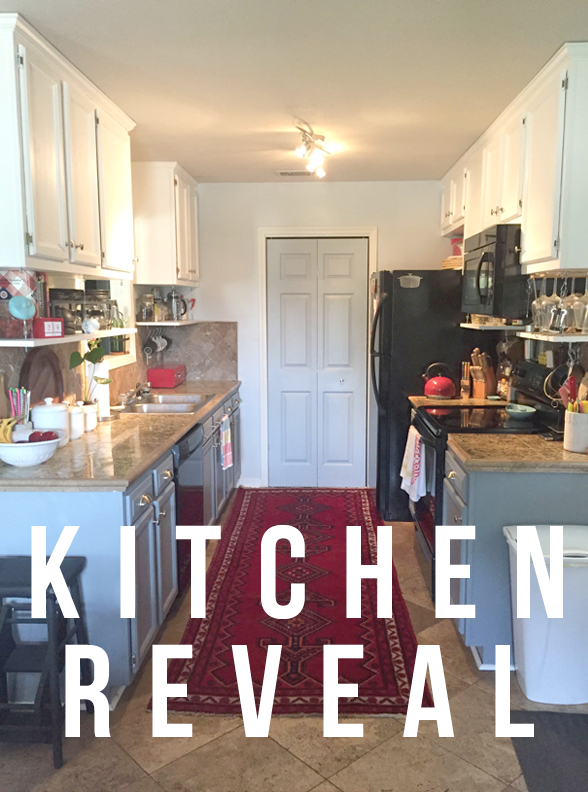
There's nothing quite like stepping back and saying, "Yes, I made that."

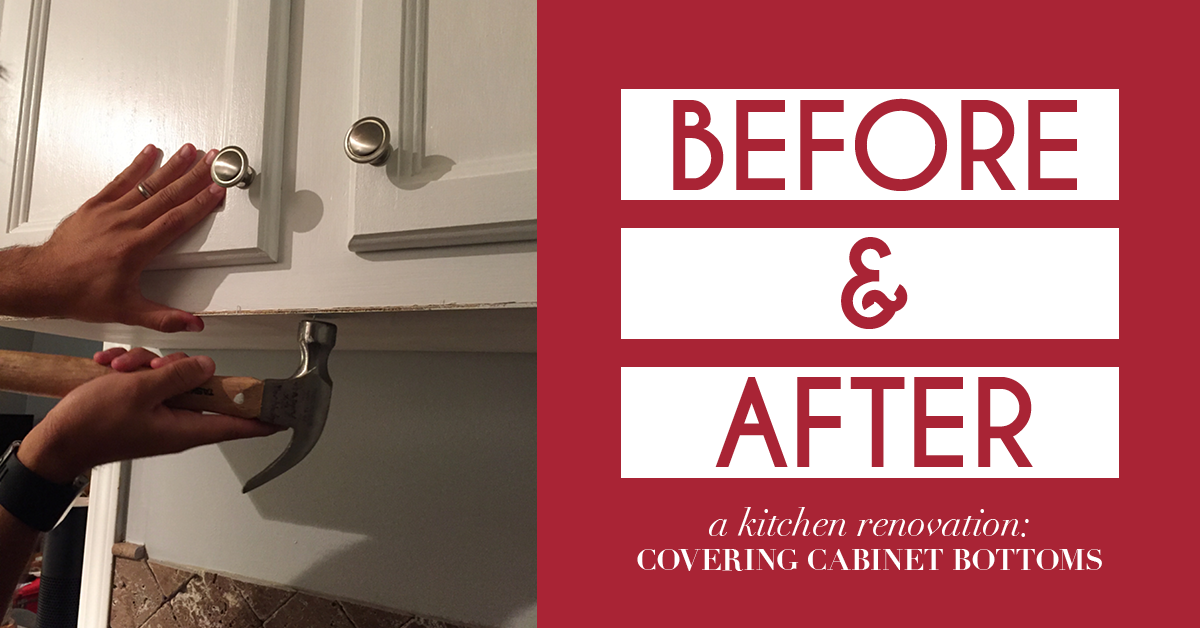
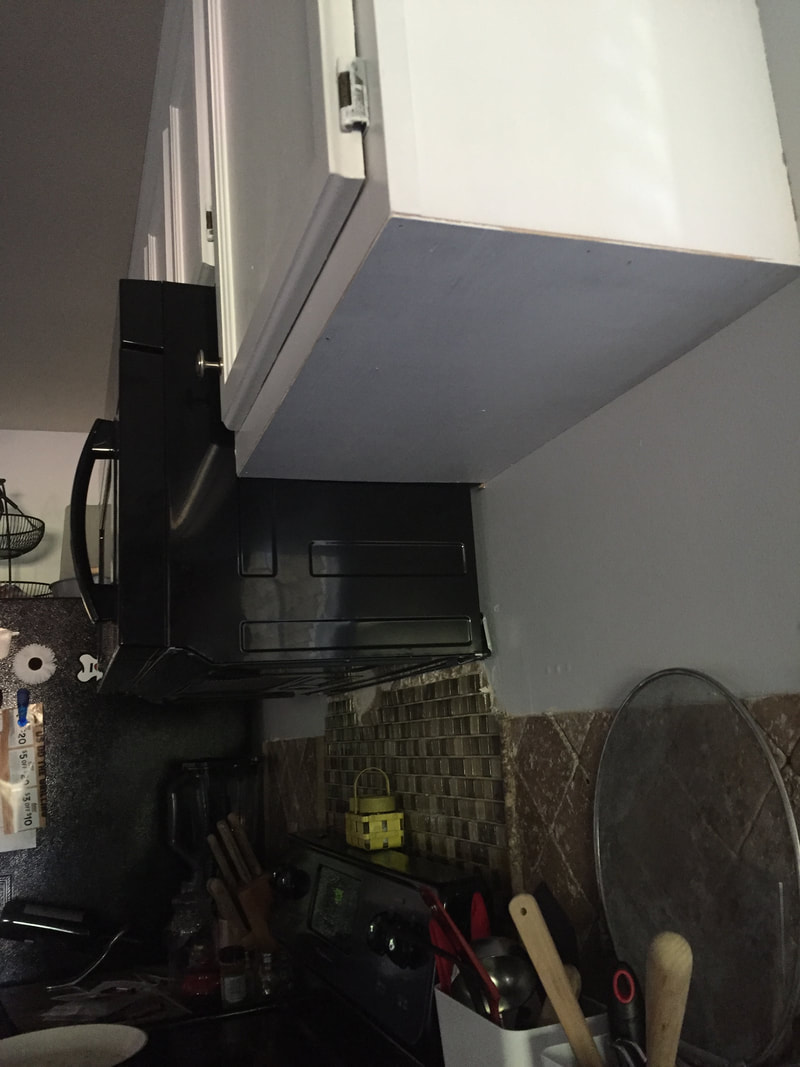
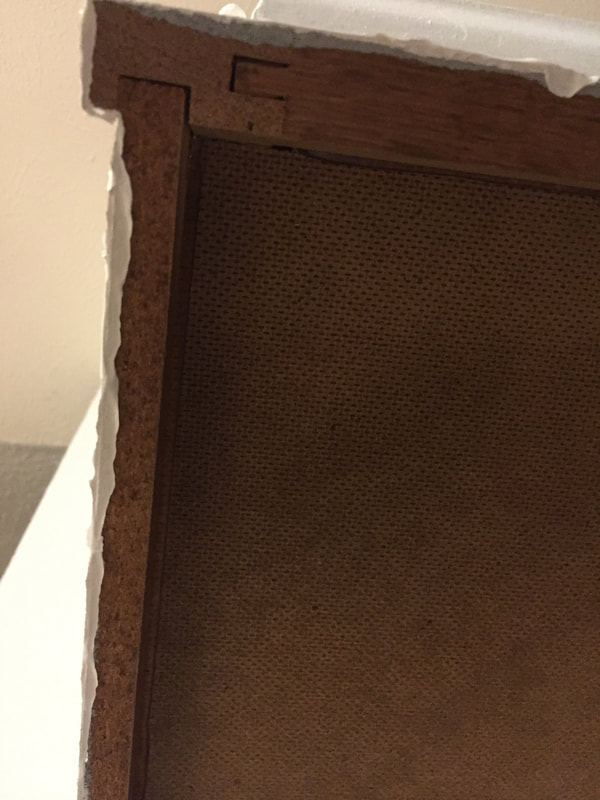
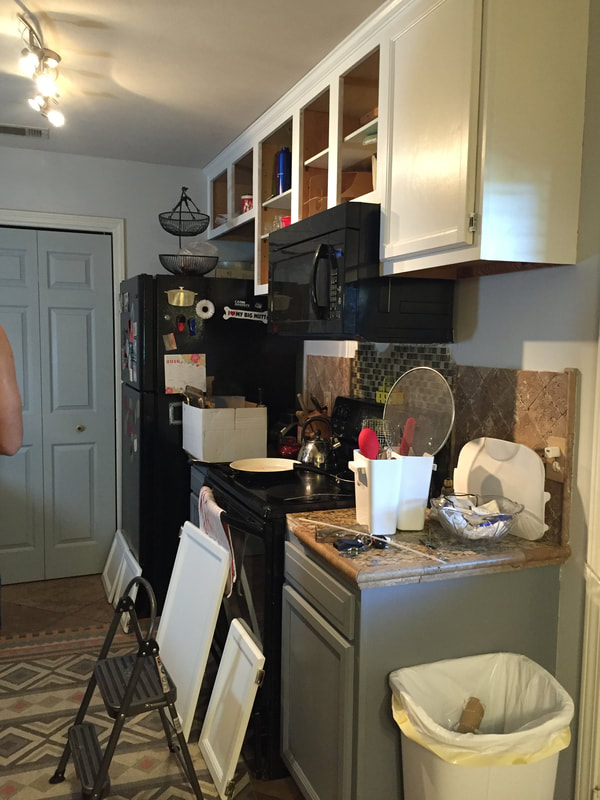
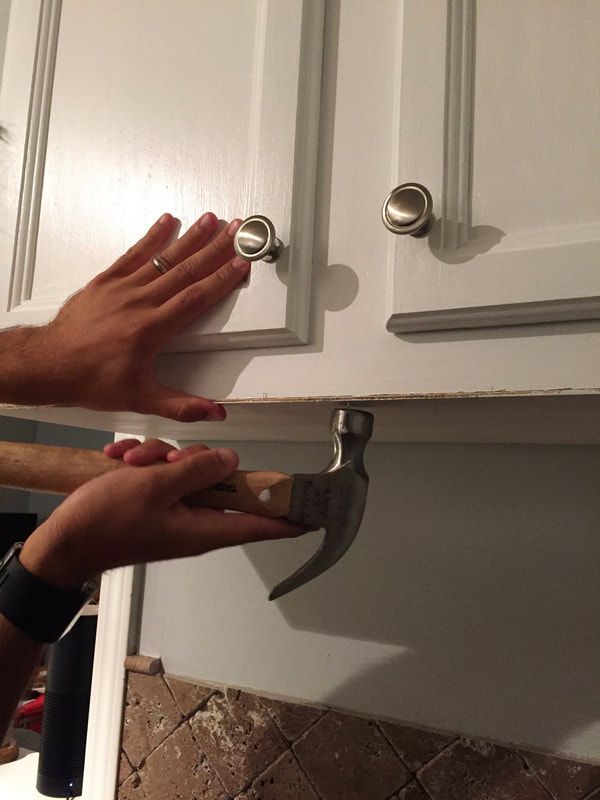
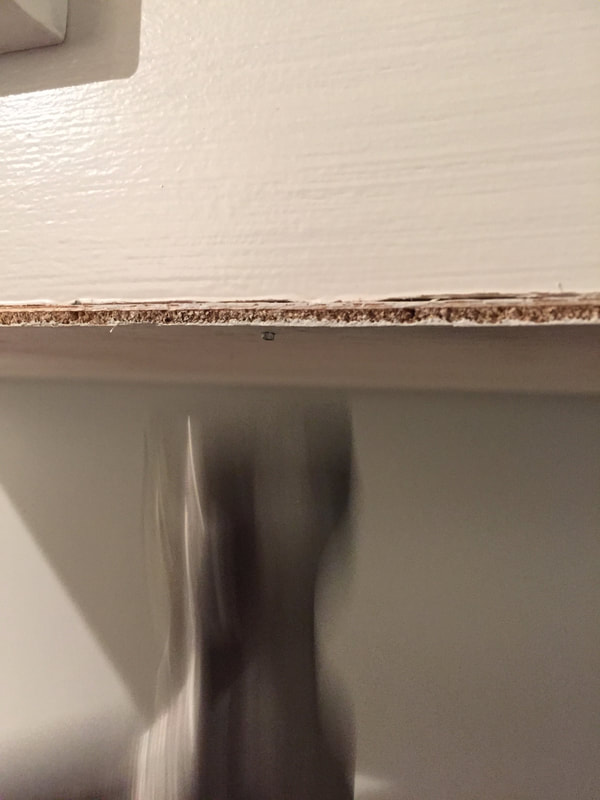
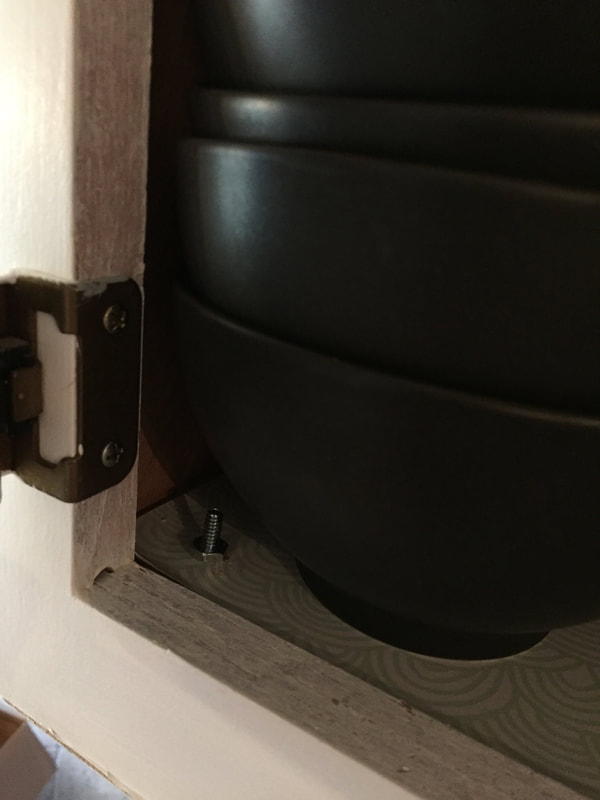
Before I started this project, I knew it was going to be a long one. Once the cabinets were raised, the ugly underside became MUCH more visible. The next step in our kitchen renovation was to cover that mess up.
WHAT YOU NEED:
Slap some paint on, and nail it up! Then get to caulking/spackling all the cracks.
IF YOU'RE ADDING OPEN SHELVING:
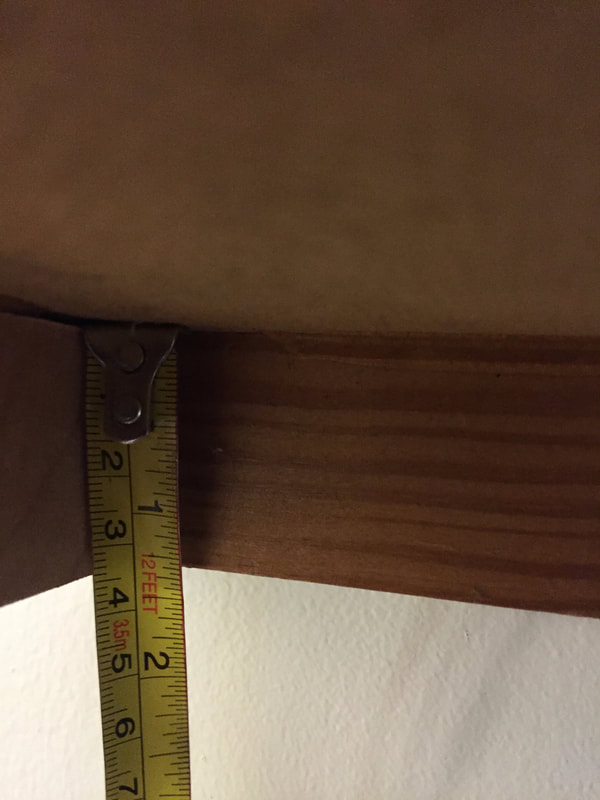
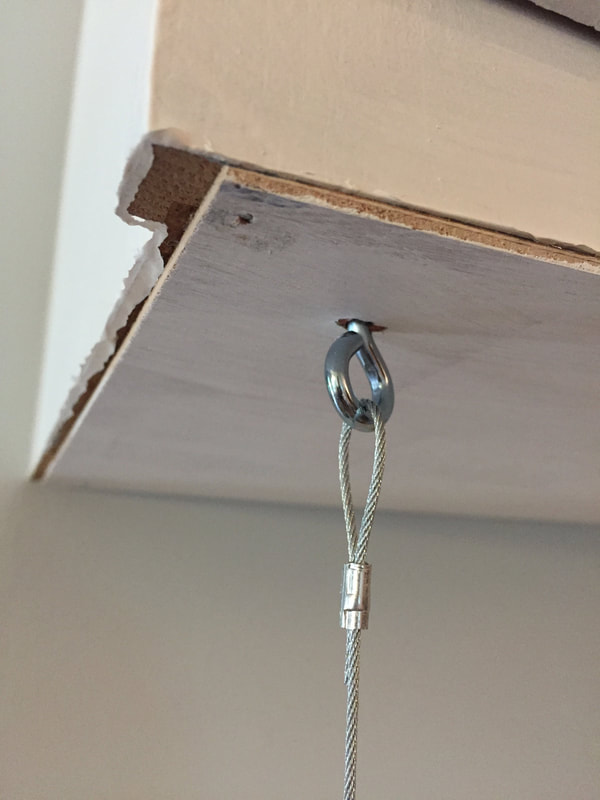
You will need to measure the distance between the bottom of your cabinet shelf, and the bottom of the cabinet edge BEFORE you cover them. Use this measurement to purchase your eye bolts for holding the shelves on! I drilled my holes after I attached all my bottoms, so you don't have to worry about doing that yet.
UP NEXT: adding open shelvingFollow the series by starting at the beginning:
YOU MIGHT ALSO LIKE: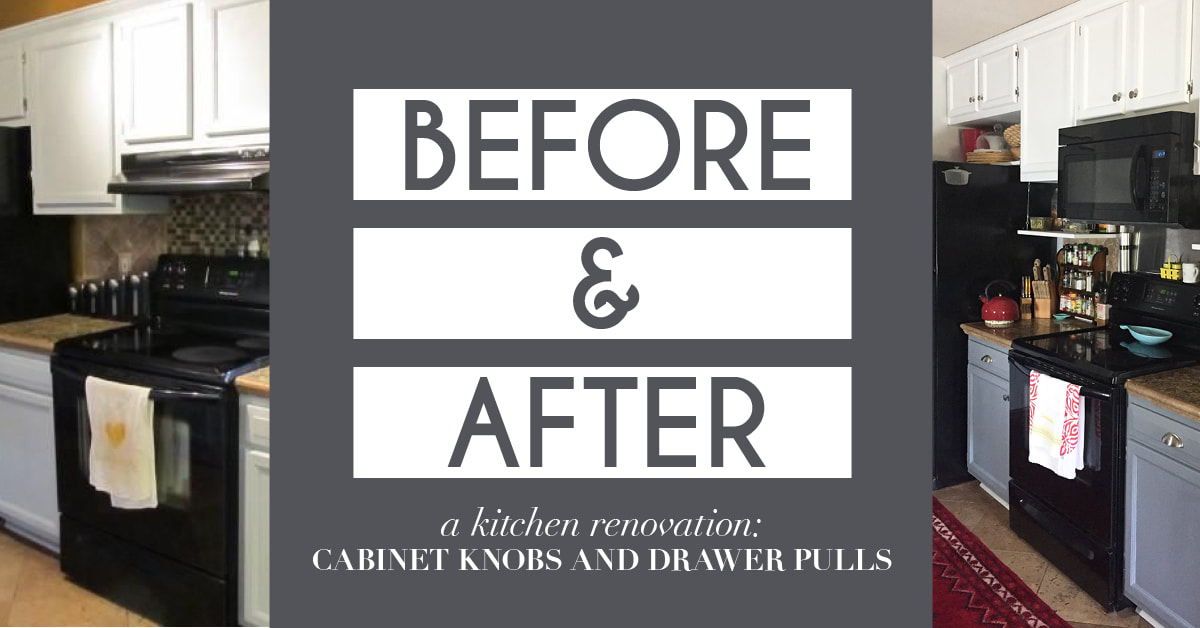
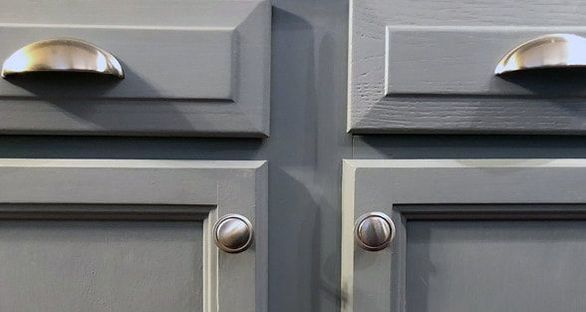
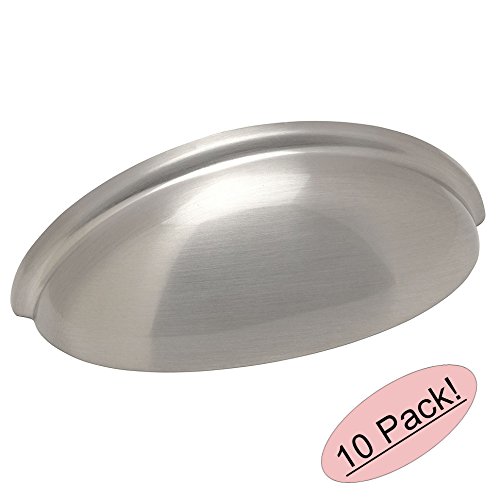
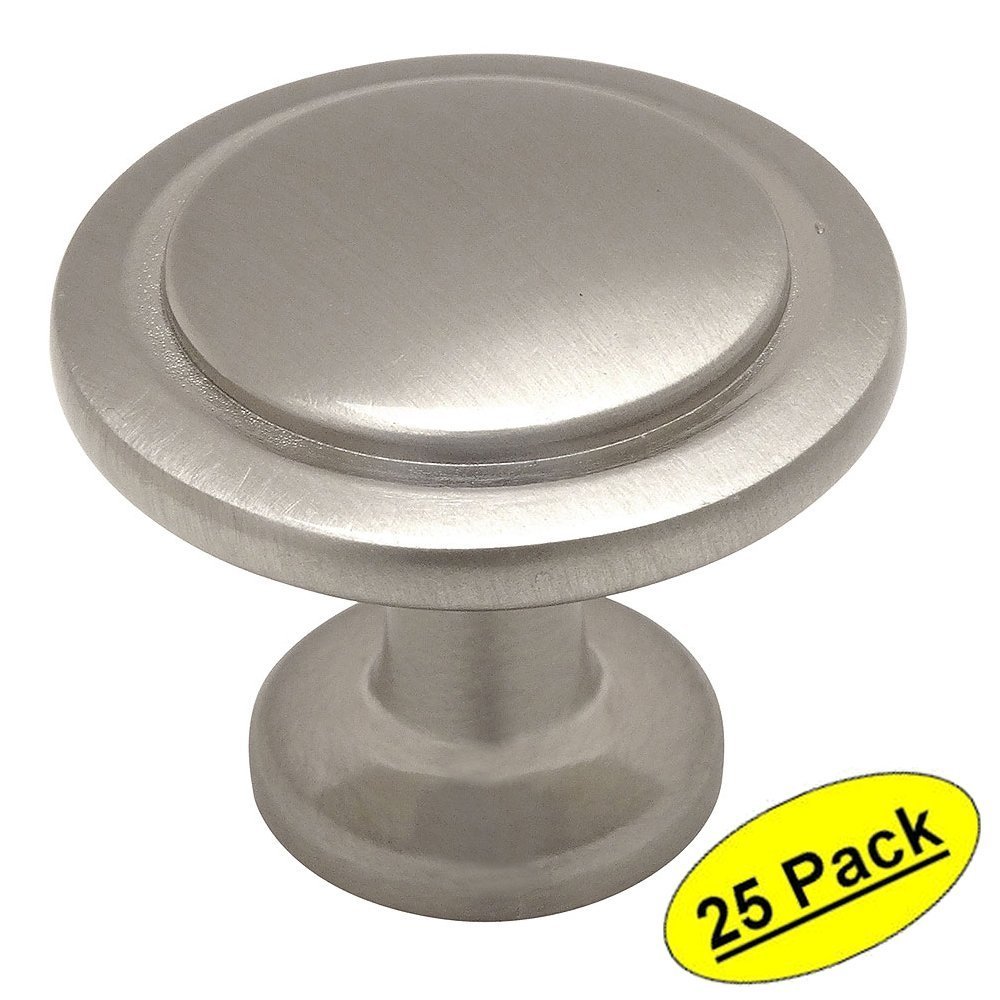
Knobs are sometimes overlooked, but when they aren't there--you miss them! The cabinets look slightly unfinished and nothing is super easy to open. Knobs and handles can be expensive. But not if you go to my favorite shopping place. That's right, Amazon. I went with a chrome/stainless steel look. I chose knobs for cabinets, and pulls for the drawers.
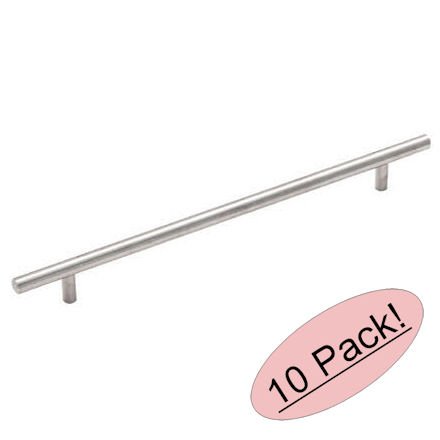
That long bar? I use it as a kitchen towel holder under my sink.
Now, I have my knobs and pulls in hand. I realized...I have no idea what a normal height or setting is for a knob on a cabinet. Then I started looking everywhere I went. They all looked weird. Every last one of them. It was like when you say a word over and over and that word starts to sound weird. That's how I felt about the knobs I noticed. After reading what seemed like every article on pinterest about proper cabinet knob placement, the difference between knobs and pulls, modern measurements and traditional...I found this bad boy and said to heck with it. They're all in the same place, and they look great. Word of advice: it just really doesn't matter that much. Go with your personal preference.

Follow the series by starting at the beginning: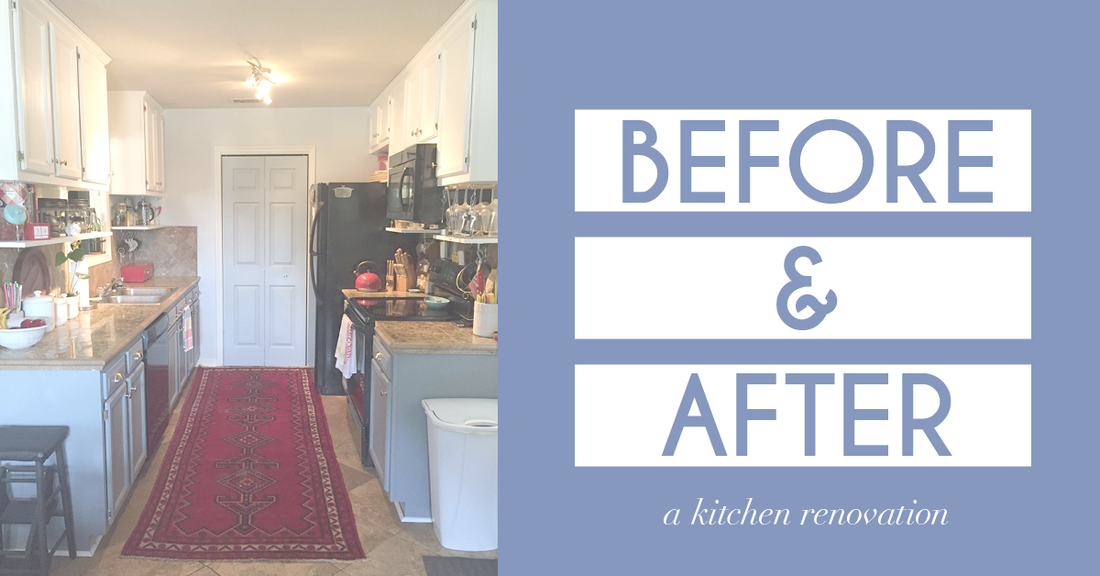
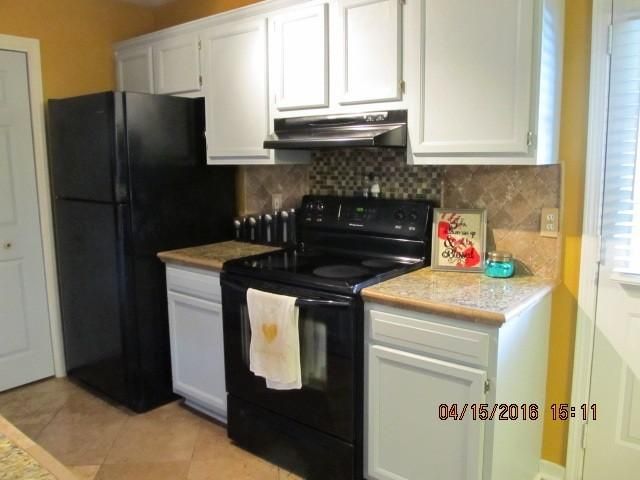
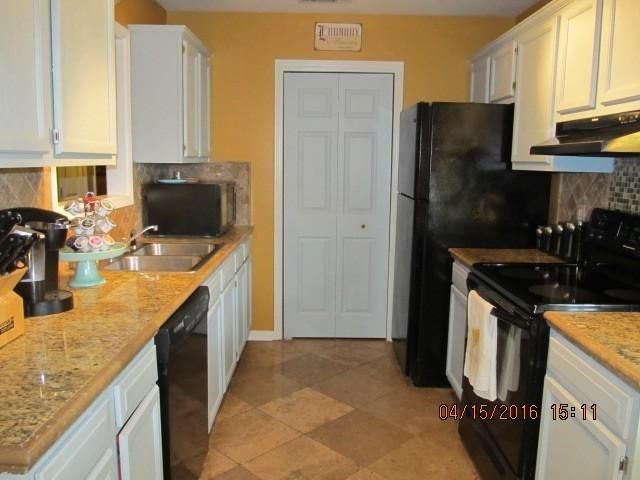
You might also like: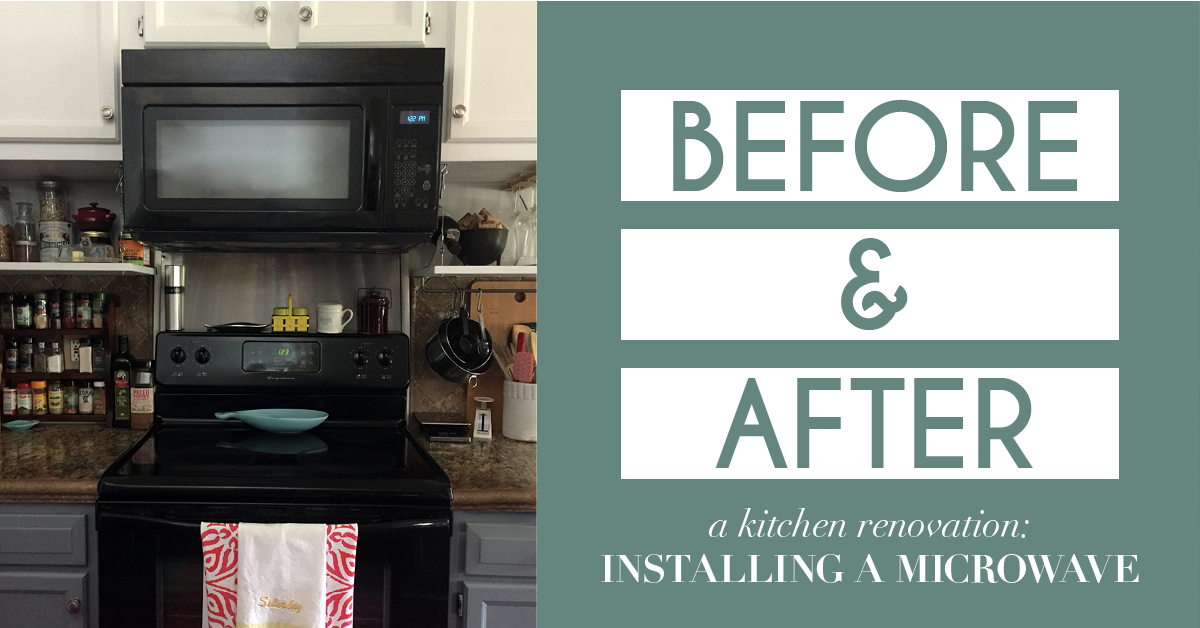 I raised my kitchen cabinets for many reasons. One of those reasons was the microwave. In a small home, you have to utilize every inch of space. I couldn't waste precious counter space with a clunky microwave. I needed an over-the-range microwave. As you can see in this before picture...unless I wanted to rest my head on the microwave as I cooked, there was no way it would fit.
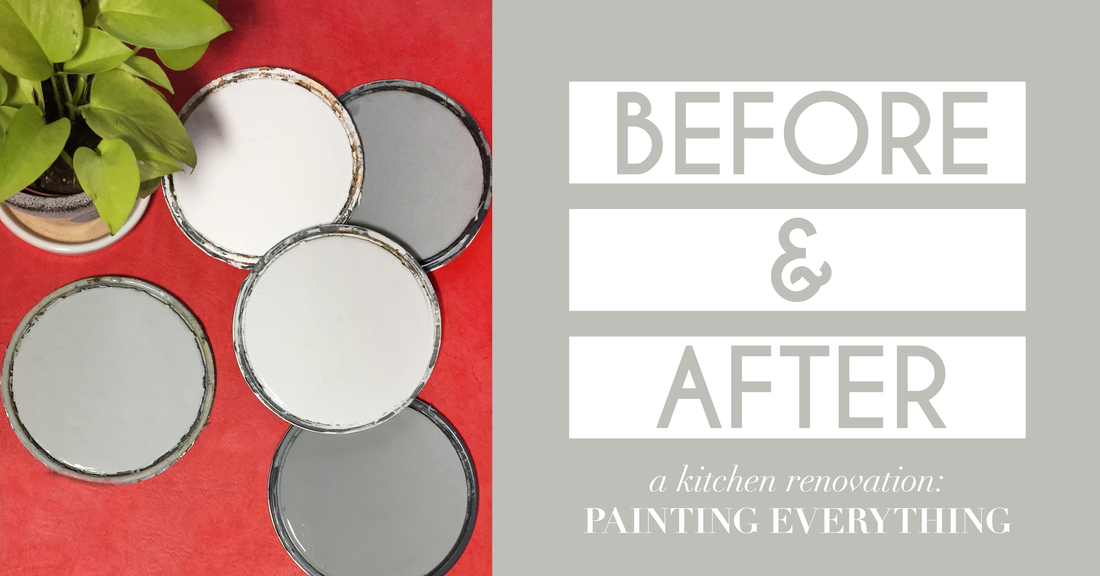 Painting. Some people love it, some people loath it. I'm somewhere in between.
Painting is the easiest way to quickly change the feel of a room, but sometimes it can be tedious, messy and a general pain in the rear. Especially painting cabinets. Did I care? nope. Did it anyway and I don't regret it at all! When we moved in, our entire house was warm colors: the floor, the walls, the counter tops. I'm talking brown. Brown and dark yellow. I couldn't resist the 2017 dusty blue/grey trend. Here are my paint colors throughout my entire house: 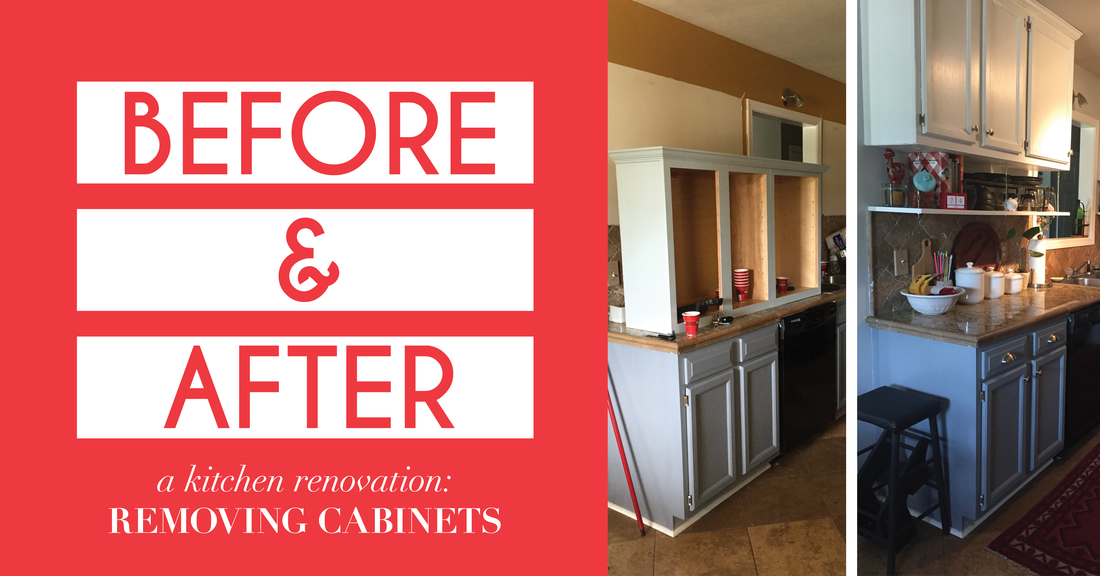 Welcome back!Obviously, as soon as we moved into our house I had a to-do list a mile long. I wanted to do EVERYTHING as soon as we unlocked the door for the first time. Here we are, over a year later, with a to-do list only a quarter of a mile long :)
Our first huge project was the kitchen. I knew if we put our dishes away without doing our kitchen renovation first...it would never, ever happen. So! It became my top priority and the first step was to remove the cabinets. If you haven't been following along, you should know that I have started a series on updating my kitchen. Find the original post by clicking HERE! Domestic Imperfection gave me the confidence to actually do this. Luckily, my cabinets don’t involve any corners, so it was actually really easy. I say that...It was easy because I had lots of laborers helping to remove them. Please do not try to remove or reinstall your cabinets by yourself. You’ll undoubtedly break something; either yourself or your cabinets. 
When you're a hoarder and you own a tiny home (it's not actually that tiny!) you have to get creative with storage and organization. I knew I wanted a smaller home for several reasons: a) it's less to clean and b) we couldn't afford anything bigger
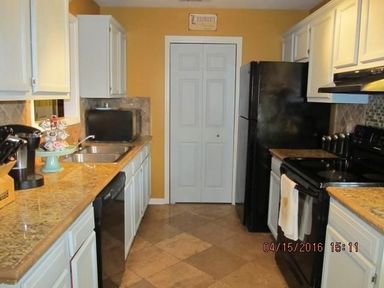
I wasn't super happy with the layout of our house. We live in a "cookie cutter" neighborhood with three layouts of the most adorable houses ever. One of the three layouts has an AMAZINGLY OPEN kitchen. The other two...do not. They have "galley" kitchens. Now that I'm thinking about it there are definitely more than three layouts to the houses in my neighborhood... Anyway, I found a GREAT step by step tutorial on how to raise cabinets and add a shelf. Now I LOVE my kitchen. Here's the original tutorial from Domestic Imperfection: http://www.domesticimperfection.com/2013/02/decked-out-kitchen-reveal/ Basically, I copied their entire kitchen. I so badly want the butcher block counter tops, but I just can't justify ripping out our granite tile. Or our stone backslash. It makes me very sad, but I've learned to deal with it. Photos from the home listing:
Those cabinets look like an awesome white/grey color. They were not. They were definitely baby blue and weird. A good attempt, but just...no.
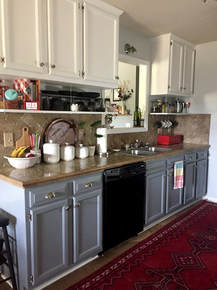
MY KITCHEN NOW: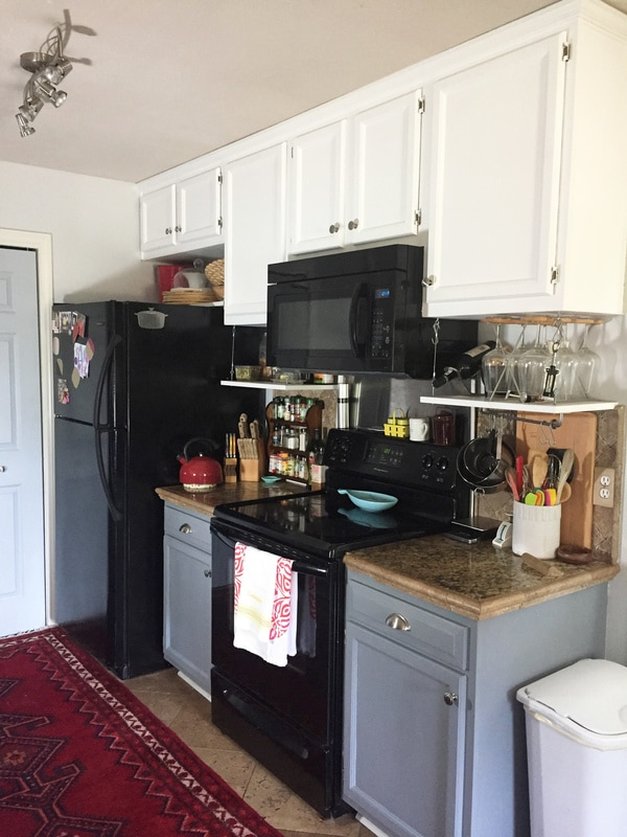

|

Hi, I'm Rachel.I pick up other people's garbage and take it home. Whatcha lookin for?
All

By Date:
July 2018
|


 RSS Feed